The FoxyProxy extension makes managing multiple Proxy configurations and credentials very easy. Everything is handled within the extension available in the browser and you can switch them on and off as you want.
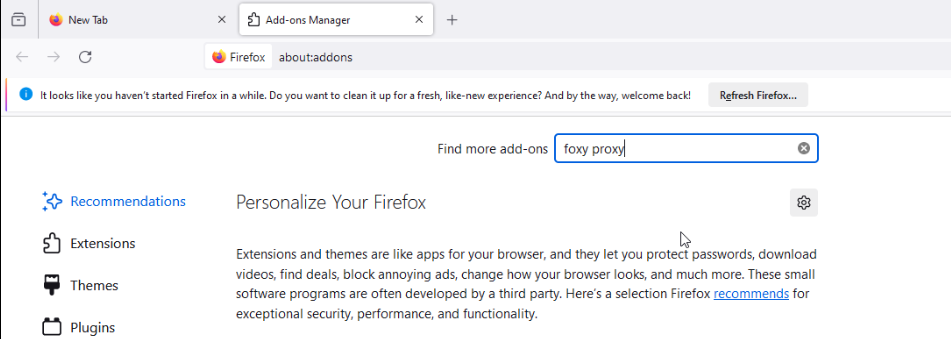
The first step is to install the extension. Open Firefox and open the Add-ons Manager - Located in the top-right browser bar, [it looks like a puzzle piece], it will open the Add-ons Manager page.

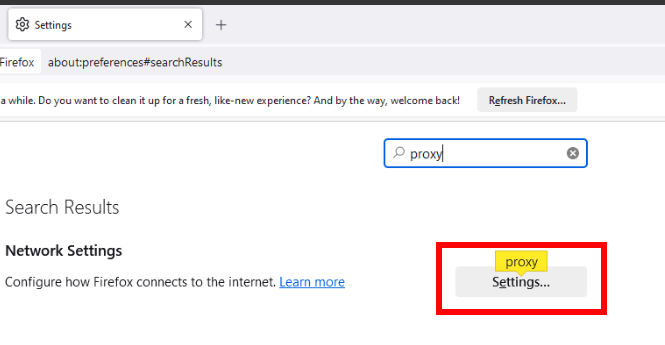
Search for ‘foxy proxy’ [without the quotes] in the Search bar and hit ‘Enter’
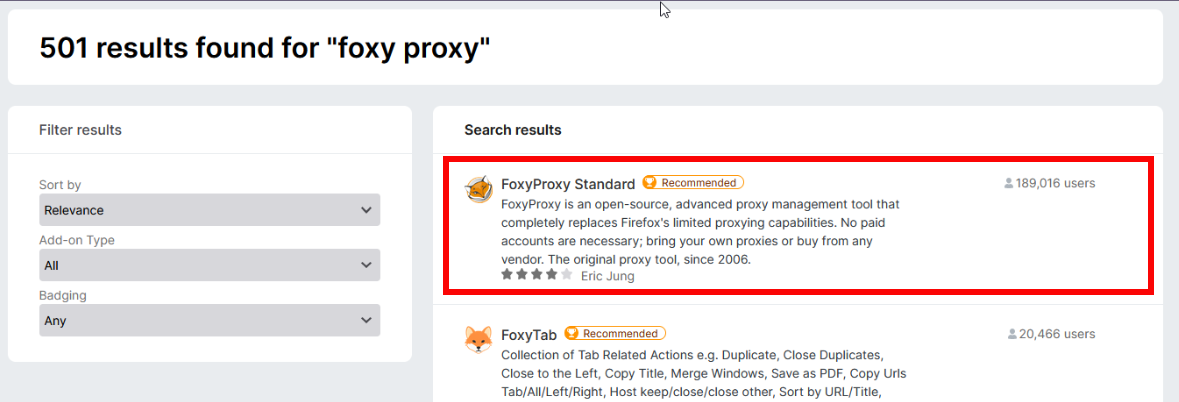
The ‘FoxyProxy Standard’ is what you want to click on, should be the first on the list in the results.
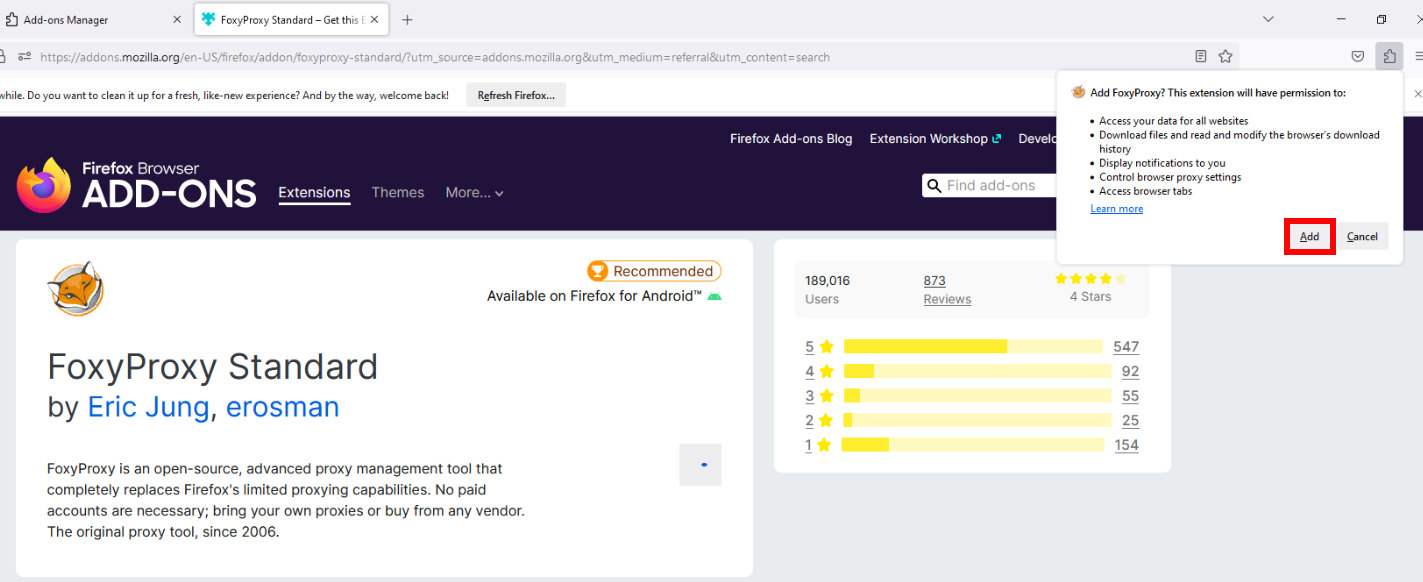
Click ‘Add to Firefox’ to install the Extension.

You will see a Pop-up box in the Top Right corner of your Browser. Click ‘Add’ to Confirm you want to add this extension to Firefox, and approve the permissions it requires.
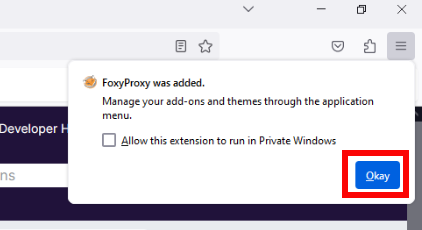
A Notification will appear, informing you that FoxyProxy Extension was added to Firefox. Click ‘Okay’.
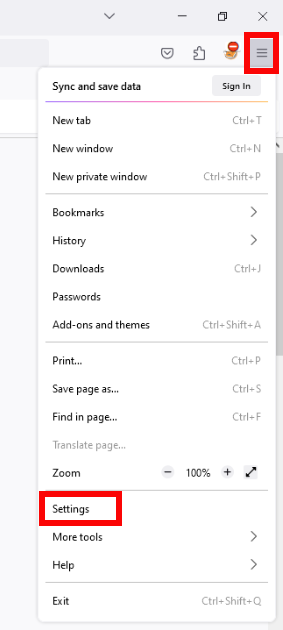
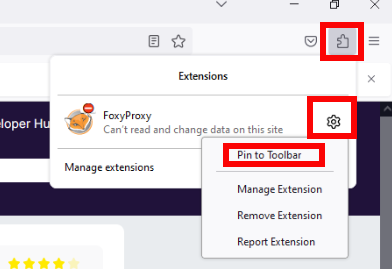
This step is not Required, but for convenience, you can Pin the Extension to your Toolbar, or you can access it under the Add-ons Button in the Toolbar. To Pin the Extension to your Toolbar, click the Add-ons icon, click the Settings gear next to FoxyProxy Extension, and finally click ‘Pin to Toolbar’.
You will then see the FoxyProxy Extension directly available from the Toolbar.

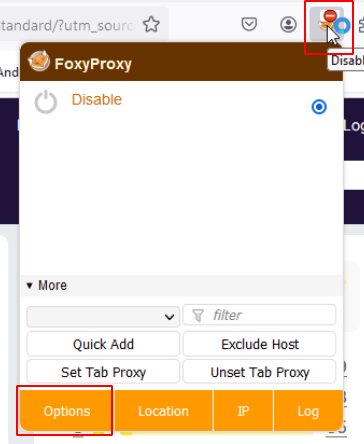
Now that FoxyProxy Extension is installed, we can configure the Proxy information so we can use the Browser Surrogate. Click the Foxy Proxy Extension, and click ‘Options’.
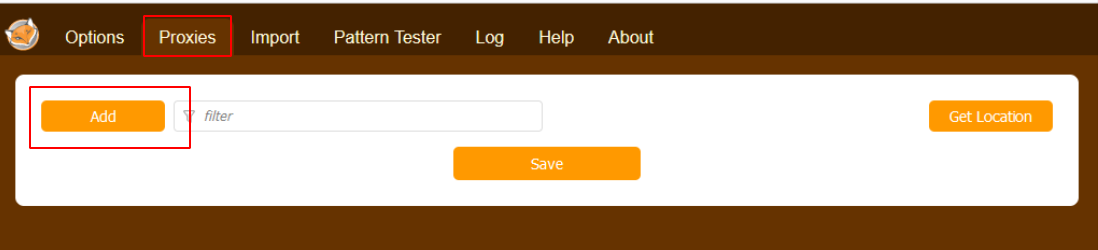
Now click the ‘Proxies’ tab, and Click ‘Add’ to add a new Proxy.
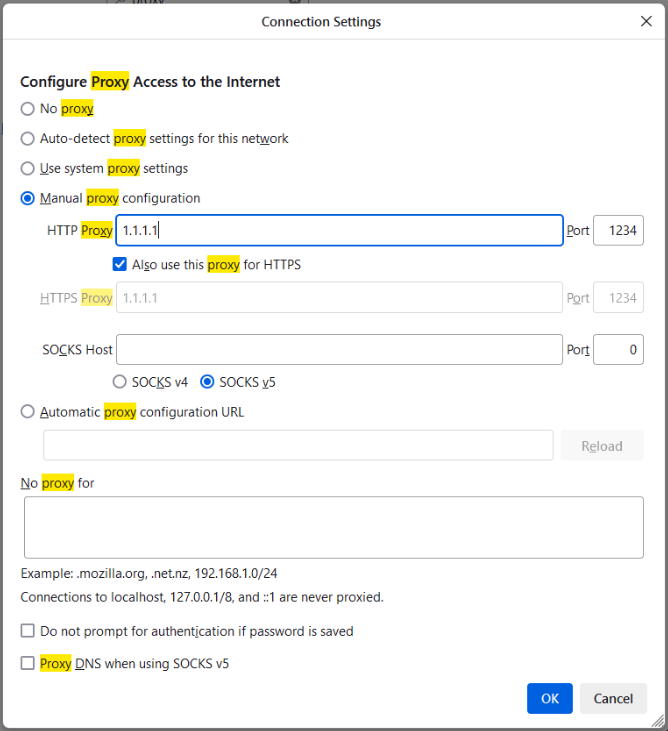
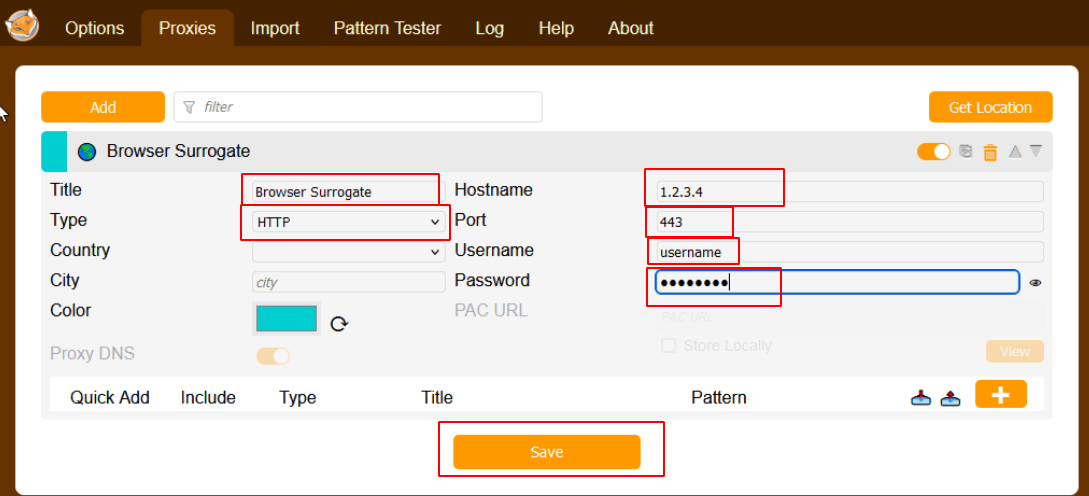
Enter a ‘Title’, for example ‘Browser Surrogate’, and make sure the ‘Type’ is ‘HTTP’. You can also choose a specific color to identify this proxy where it says ‘Color’. All of the information on the right will be sent to you via email after Registering for an account.
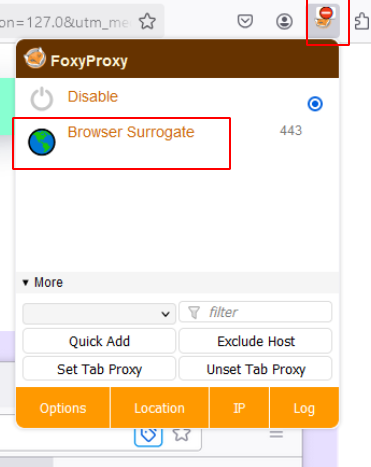
Now when you click the Foxy Proxy Extension, you will see the newly created Proxy. Click the new Proxy.
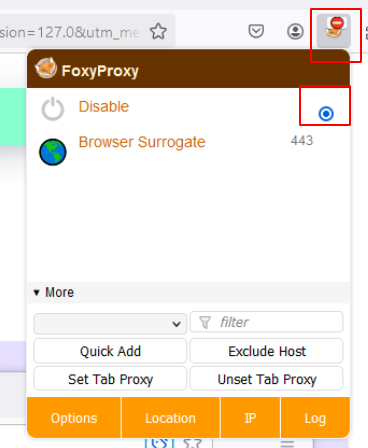
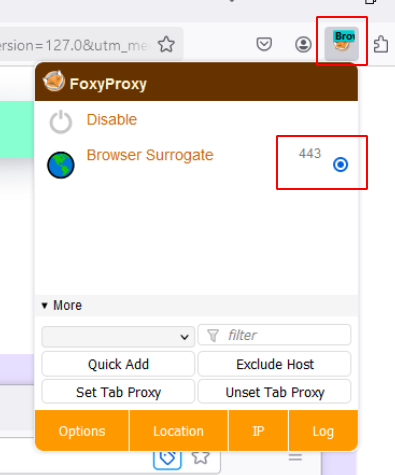
In the FoxyProxy Extension you will see the dot indicate the ‘Browser Surrogate’ proxy is now Enabled. You can also see the Foxy Proxy Extension now has a ‘Green’ banner. This color can be changed in the FoxyProxy ‘Options’.
To Disable the Browser Surrogate, click the Foxy Proxy Extension and Click ‘Disable’.

You will now see the Foxy Proxy Extension show its original icon indicating no proxy is configured or enabled. You can also see the Dot is back next to ‘Disable’.